This post may contain affiliate links. As an Amazon Associate I earn from qualifying purchases at no extra cost to you.
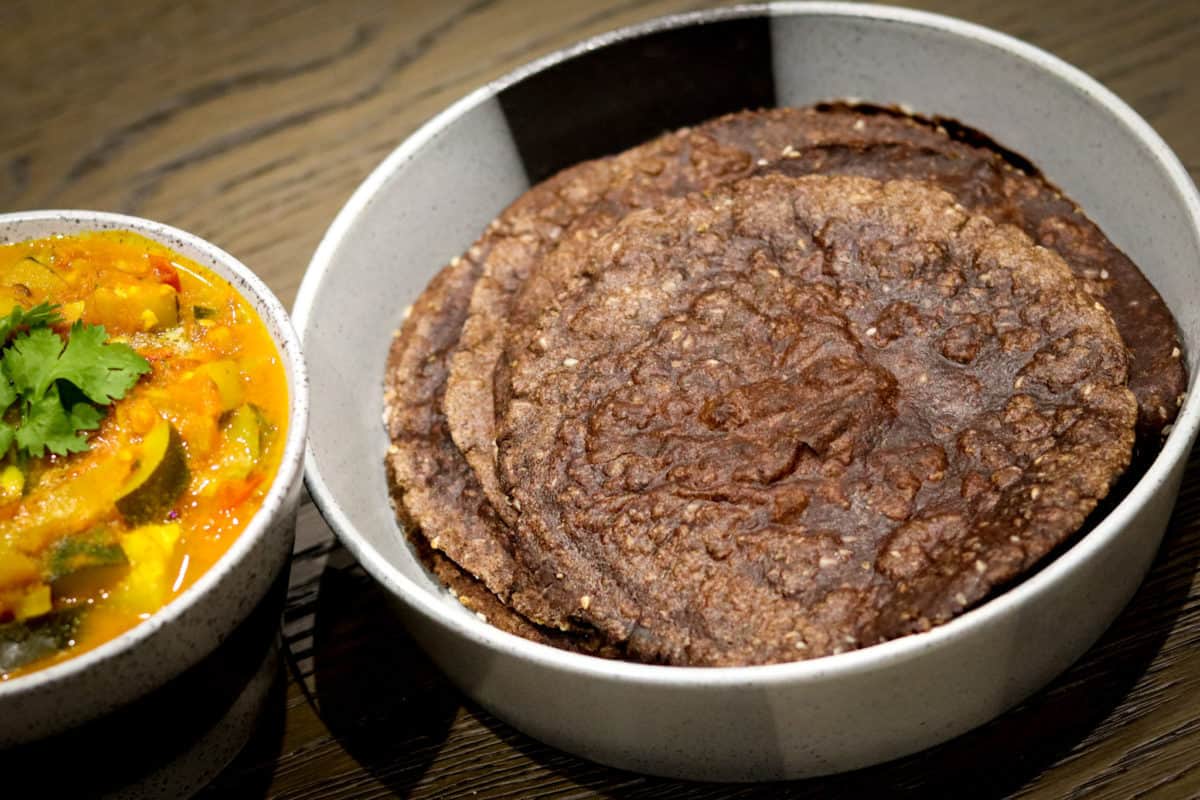
Ragi roti or nachni roti is a traditional Indian flatbread made from the flour of red millet, also known as finger millet. It is a beloved staple of many Indian households due to its delicious flavour and versatility. Originating in the southern and western parts of India, this dish has been enjoyed for centuries and is full of nutritional benefits. Ragi roti pairs exceptionally well with curries, pickles, chutneys, and more.

Jump to:
- What is ragi and how is ragi flour or ragi atta made
- What is a roti
- Other names for ragi roti
- Benefits of ragi roti
- Ingredients
- How to make ragi roti aka madua roti or nachni roti
- Variations
- Additional tips
- Serving suggestions
- Storage instructions
- FAQ
- Ragi roti recipe
- Ragi roti | Madua roti | Nachni roti | Ragi chapati | Finger millet roti
What is ragi and how is ragi flour or ragi atta made
Ragi, also known as Finger Millet, is a cereal grain native to the Indian subcontinent. It is a gluten-free grain packed with essential nutrients and used to make flour, porridge, pancakes, and other staple dishes. Ragi flour or ragi atta is made by soaking the grains overnight, grinding them into a paste and then drying them into a fine powder. This powder can be used to make various dishes and is also used as an ingredient in many recipes, including bread, pancakes, and porridge.
What is a roti
Roti or chapati is a soft flatbread, typically made from whole wheat flour. It is prepared by kneading the flour dough, flattening the dough balls into flat round circles and frying them on a griddle or tava on both sides. Rotis are perfect for scooping up hot curries, dals, and stews.
Although native to India, rotis are commonly eaten across different parts of the world. Makki di roti, Bajra roti, Rumali roti, Paratha, Roti Canai, Tandoori roti are a few of roti.
Other names for ragi roti
Ragi roti is also known as ragi chapati, ragi rotti, madua roti or nachni roti in Hindi.
Benefits of ragi roti
Ragi roti is a healthy flatbread made from ragi aka finger millet flour. Ragi is a highly nutritious whole grain. It is high in dietary fiber, protein, and essential minerals like calcium, iron, and potassium, making it a healthy and nutritious meal choice. Plus, it is gluten-free.
Ingredients
To make soft ragi rotis you need only 4 key ingredients:
Ragi flour ( I used Organic Ragi Flour from EL World),
water,
salt, and
oil.
I like to add coriander powder, cumin powder, sesame, and carom seeds to enhance the flavour. But this is optional.
How to make ragi roti aka madua roti or nachni roti
This ragi roti recipe is slightly different from that of a traditional roti. It is simple to make but requires patience and love as it involves a sticky dough.
Step 1 – Make the ragi roti dough
In a large saucepan, add water, a pinch of salt and a teaspoon of oil. Bring this to a boil.
When you start seeing bubbles, lower the flame and add the ragi flour.
Mix well using a spatula until the flour is thoroughly combined.
Turn off the flame and transfer the flour to a large mixing bowl.
Add the sunflower oil and mix well using a spatula. Do not use your hands at this stage, as the flour will be too hot to handle.
Leave this mixture to cool for a few minutes.
Once it comes to room temperature, add the carom seeds, sesame seeds, coriander powder and cumin powder for extra flavour. Continue to mix everything using wet hands to form a soft dough. Wetting your hands makes it easy to handle the dough as it can still be a bit hot.
The dough should be soft and should not stick to your fingers when you press into it.
Rub a few drops of oil on top of the dough and cover it with a damp towel. Let it rest for 10 minutes.
Step 2 – Make the rotis
Place a cast-iron pan or a tawa on medium-high heat.
Once the dough has rested well, divide it into small balls. Using two cups of ragi flour, I made ten dough balls.
Take a dough ball and dust it in ragi flour so it doesn’t get too sticky.
Flatten the dough ball into a round flat circle using a tortilla maker or a rolling pin. I prefer using a tortilla maker as it is quick and efficient, but a rolling pin also works well. If using a rolling pin and board, use parchment paper to prevent the dough from sticking to the board.
Place the flattened dough on the pan.
Flip the roti after 40 seconds* or once you see tiny air pockets.
Rub some sunflower oil or ghee (skip if vegan) on the cooked side and gently press the edges. You will sometimes see giant air bubbles, which is such a joy!
Flip the roti again and apply some sunflower oil. Brushing with oil is optional, but it adds flavour and keeps the rotis soft for a long time.
Do not overcook the rotis as they can turn very hard.
Once ready, transfer them to a roti basket to retain their softness.
Repeat the above steps with the remaining dough balls.
These ragi rotis are:
Super-healthy
Gluten-Free
Dairy-Free
Vegan
Delicious
Savoury
Comforting
and, Highly versatile.
Variations
- Add a variety of herbs or spices to the ragi flour to give it more flavour. My favourites include methi or fenugreek leaves, fresh coriander, and spinach.
- Make ragi roti wraps with roasted vegetables, lettuce, and your favourite sauces.
- Make a sweet version by adding a bit of jaggery or coconut sugar when making the dough.
Whatever your preference, ragi roti is a versatile and delicious dish with lots of room for experimentation and creativity.
Additional tips
- When you add ragi flour to boiling water, the mixture can get quite sticky. Use a silicon spatula to combine and scrape the edges. You are not looking for a dough at this stage. The flour and water just need to be well combined.
- Since ragi flour is gluten free, the dough will be a bit sticky. Do not give up. Use your hands to knead the dough, and it will come together.
Serving suggestions
Just like any roti, ragi rotis are incredibly versatile. Serve ragi rotis with curries, dal, stews, cooked vegetables, kebabs and many more. The options are endless.
I love ragi rotis with:
Pumpkin curry and
Let me know what your favourite combination in the comments below.
Storage instructions
Store leftover rotis in an air-tight container in the refrigerator, and use them within 1 to 2 days.
You can also store the ragi dough in an airtight container in the fridge for up to 1.5 days.
FAQ
Yes, ragi roti can be stored for later use. The best way to store it is to wrap each roti in foil or plastic wrap and then place in an airtight container in the refrigerator.
Most likely because the dough has been spread too thin. The dough should neither be too thick nor thin. If the flattened dough is too thick, it can become too hard after frying.
If you try this recipe, please let me know in the comments and don’t forget to leave a rating. I love hearing from you!

Ragi roti recipe

Ragi roti | Madua roti | Nachni roti | Ragi chapati | Finger millet roti
Ingredients
- 2 cups ragi flour or finger millet flour plus another 2tbsp for dusting
- 2 cups water
- 1 teaspoon salt
- 3 tablespoon sunflower oil
- 2 tablespoon sesame seeds optional
- 2 tbsp carom seeds optional
- 1 tablespoon coriander powder optional
- 1 tablespoon cumin powder optional
Instructions
Make the dough
- In a large saucepan, add water, a pinch of salt and a teaspoon of oil. Bring this to a boil.
- When you start seeing bubbles, lower the flame and add the ragi flour. The ratio of water and flour should be 1:1. In a separate bowl, add 2 tablespoon ragi flour for dusting the dough.
- Mix well using a spatula until the flour is thoroughly combined.
- Turn off the flame and transfer the flour to a large mixing bowl.
- Add 1 tablespoon oil and mix well with the spatula. Do not use your hands at this stage, as the flour will be too hot to handle.
- Leave this mixture to cool for a few minutes.
- Once it comes to room temperature, add the carom seeds, sesame seeds, coriander powder and cumin powder. Continue to mix everything using wet hands to form a soft dough. Wetting your hands makes it easy to handle the dough as it can still be a bit hot.
- The dough should be soft and should not stick to your fingers when you press into it.
- Rub a few drops of oil on top of the dough and cover it with a damp towel. Let it rest for 10 minutes.
Make the rotis
- Place a cast-iron pan or a tawa on medium-high heat.
- Once the dough has rested well, make small-medium dough balls. Using two cups of ragi flour, I was able to make ten dough balls.
- Take a dough ball and dust it with some ragi flour, so it doesn’t get too sticky.
- Flatten the dough ball into a round flat circle using a tortilla maker or a rolling pin. I prefer using a tortilla maker as it is quick and efficient, but a rolling pin also works well.
- Place the flattened dough on the pan.
- Flip the roti after 40 seconds* or once you see tiny air pockets.
- Rub some oil/ghee on the cooked side and gently press the edges. You will sometimes see giant air bubbles, which is such a JOY!
- Flip the roti again and apply some oil/ghee. Brushing with oil/ghee is optional, but it adds flavour and keeps the rotis soft for a long time.
- Do not overcook the rotis as they can turn very hard.
- Once ready, transfer them to a roti basket to retain the softness.
- Repeat the above steps with the remaining dough balls.
Notes
- Nutritional values are a rough estimate for guidance.
- Carom seeds, sesame seeds, coriander powder and cumin powder add a great flavour to the ragi rotis. But adding them is optional.
- *This is an approximate time. The actual time will vary based on the temperature, type of pan, flour, and thickness of the roti.


Mona
These were very soft and fluffy. thanks for the recipe. For the first time I made the perfect ragi chapatis!
Vegetarian Globe
Thanks Mona. Glad you love them.